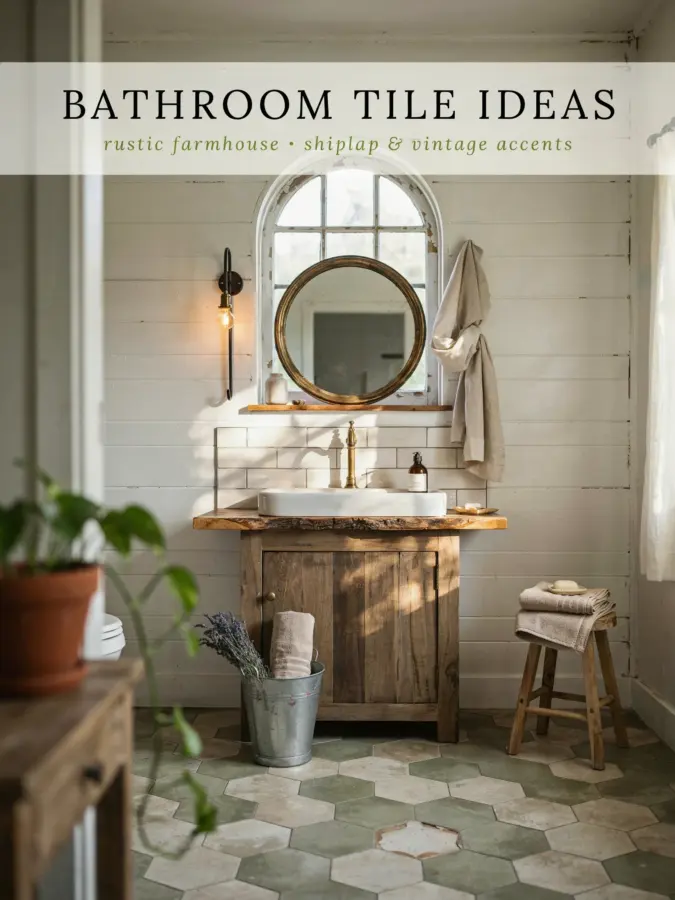
If you have a tiny bathroom, you already know the challenge of making it feel spacious and stylish without spending a fortune. The good news is that smart small bathroom tile ideas can completely change how the room looks and feels, and you don’t need a contractor’s budget to pull it off. With a few deliberate choices in pattern, color, and layout, even the smallest powder room can feel like a breath of fresh air. I’ve remodeled my own cramped guest bath on a tight budget, so I’ll walk you through the exact steps I used and the tile tricks that actually work.
Classic Subway Tile Patterns That Make a Small Bathroom Feel Bigger
Subway tile is a go-to for good reason. It’s cheap, widely available, and endlessly adaptable. But the magic happens when you choose the right pattern. For a small bathroom, avoid the standard horizontal brick lay (stacked or running bond) if you want to maximize visual length. Instead, try a vertical subway layout. It draws the eye upward, making the ceiling feel higher. I did this in my own half bath with 3×6 inch white tiles in a straight vertical stack, and it added a good four inches of perceived height.
Another pattern that works well is the herringbone subway layout. Yes, it takes more cuts and a bit more patience, but the diagonal lines create movement that distracts from the small footprint. If you’re on a strict budget, stick to a simple running bond in a lighter shade. Pair it with a contrasting grout (like a medium gray) to define each tile without overwhelming the space.
Budget Friendly Geometric Mosaics That Don’t Look Cheap
Geometric mosaic sheets are a fantastic way to inject personality without buying expensive individual tiles. You can find hexagon, penny, and arabesque shapes for under $5 per square foot at most home improvement stores. The trick is to use them sparingly. Instead of tiling the entire room, create a focal wall behind the vanity or inside the shower niche. That way you get the high impact look for a fraction of the cost.
I recommend sticking to smaller hexagon tiles (1 inch or 2 inch) because they have more grout lines, which actually add texture and grip underfoot. For the rest of the bathroom, use a plain white or cream subway tile. This contrast keeps the space from feeling too busy. If you want a geometric look but don’t want to deal with tiny pieces, go for a 4×4 inch square tile laid in a diamond pattern. It’s cheaper than mosaic sheets and still gives a playful effect.
Light Colored Grout for a Cleaner, More Open Look
One of the simplest and cheapest changes you can make is choosing the right grout color. Light colored grout (white, off white, or pale gray) reflects light and makes the room feel larger and cleaner. Dark grout can look dramatic, but in a small space it tends to break up the walls visually, making the room seem chopped up and smaller. I learned this the hard way when I used charcoal grout on white subway tile in a previous bathroom. It looked like a grid, not like a seamless wall.
If you’re worried about light grout getting dirty, pick a sanded grout in a light warm gray or beige. It hides dust better than pure white and still keeps the airy vibe. Also, consider using an epoxy grout for wet areas. It costs a bit more but resists stains and mold much longer, which saves money on future regrouting. For the floor, I’d still go with a light grout, but choose a slightly darker shade (like a pale taupe) to hide daily wear.
Vertical Versus Horizontal Tile Layouts for Narrow Spaces
Layout direction changes the whole feel of a room without adding a penny to your tile cost. In a narrow bathroom with limited floor space, vertical tile layouts are your best friend. They trick the eye into seeing a taller room, which is especially helpful if your ceiling is under eight feet. You can achieve this by stacking subway tiles vertically or using long, narrow planks (like 3×12 inch tiles) in a vertical orientation.
On the other hand, if your bathroom feels cramped but has decent ceiling height, a horizontal layout can make the room feel wider. I’ve seen this work beautifully in long, narrow bathrooms where a horizontal running bond on the longest wall pulls the eye sideways. Just keep the tiles light colored to avoid a cave like effect. A pro tip: use a full height backsplash (tile from counter to ceiling) instead of stopping partway. That continuous line makes the room feel more expansive.
Mixing Textures Without Blowing Your Budget
Texture is a secret weapon in small bathrooms because it adds depth without taking any physical space. You don’t need expensive handmade tiles to get texture. Glossy tiles reflect light and make the room feel open, while matte tiles absorb light and create a cozy, soft look. Use glossy tiles on the main wall and matte tiles on the floor or in the shower to create contrast. This combination is easy to achieve with standard ceramic or porcelain tiles that cost the same as plain ones.
Another budget friendly way to add texture is with a single accent row of decorative tile. Buy one or two sheets of a different shape (like scalloped or ribbed tiles) and place
#SmallBathroomTiles #TilePatternIdeas #BudgetBathroomRemodel #BathroomDesignTips #SubwayTile
Leave a Comment